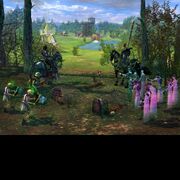
Splash Screen/Thumbnail Images guide! (H5 TotE) - by Fiur[]
How to add Splash Screens and Thumbnails to your maps.
- Splash Screens is the image displayed while the map is loading, known as PWL files in Heroes V
- Thumbnails are the pictures shown when you select the map.
Programs Needed:
- DDS editor (like Paint.NET)
Note: Back up your map before doing this!
Splash Screens[]
First, create an image you want to use as your splash screen. It needs to be 1024*766. Next ,create a 1024*1024 image that is black.
Paste the splash screen on the top of the file like the sample below:

Save your splash screen as a DDS file using these settings:
- DXT1 RGB (no alpha), no MIP maps (and 2D texture).
- It should be about 513kb.
Next, create a XML file so the game knows what to do with your image.
file: “name”.(Texture).xdb
<?xml version="1.0" encoding="UTF-8"?>
<Texture>
   <DestName href="name.dds"/>
   <Type>REGULAR</Type>
   <ConversionType>CONVERT_TRANSPARENT</ConversionType>
   <AddrType>CLAMP</AddrType>
   <Format>TF_DXT1</Format>
   <Width>1024</Width>
   <Height>1024</Height>
   <MappingSize>0</MappingSize>
   <NMips>1</NMips>
   <Gain>0</Gain>
   <AverageColor>0</AverageColor>
   <InstantLoad>true</InstantLoad>
   <IsDXT>false</IsDXT>
   <FlipY>false</FlipY>
   <StandardExport>true</StandardExport>
   <UseS3TC>false</UseS3TC>
</Texture>
Extract the file "map.xdb" from your H5M and change the <PWLPicture/> tag to this:
<PWLPicture href="name.(Texture).xdb#xpointer(/Texture)"/>
Open your map's .h5m file with WinRAR or 7-Zip and add your dds and xml file and replace map.xdb with the new one you just edited.
Thumbnails[]
Your thumbnail needs to be a 240*180 image in DDS format. When you save the file use 8:8:8:8 ARGB (32 bit). It will be approximately 225kB.
Next, creat the XML file for your thumbnail:
file: pic1.xdb
<?xml version="1.0" encoding="UTF-8"?>
<Texture>
   <SrcName href=""/>
   <DestName href="pic1.dds"/>
   <Type>TEXTURE_2D</Type>
   <ConversionType>CONVERT_TRANSPARENT</ConversionType>
   <AddrType>CLAMP</AddrType>
   <Format>TF_8888</Format>
   <Width>240</Width>
   <Height>180</Height>
   <MappingSize>0</MappingSize>
   <NMips>1</NMips>
   <Gain>0</Gain>
   <AverageColor>0</AverageColor>
   <InstantLoad>true</InstantLoad>
   <IsDXT>false</IsDXT>
   <FlipY>false</FlipY>
   <StandardExport>true</StandardExport>
   <UseS3TC>false</UseS3TC>
</Texture>
In the file map.xdb change <thumbnailImages/>to:
<thumbnailImages>
   <Item href="pic1.xdb#xpointer(/Texture)"/>
</thumbnailImages>
Also edit the file: map-tag.xdb
<?xml version="1.0" encoding="UTF-8"?>
<AdvMapDescTag>
   <AdvMapDesc href="map.xdb#xpointer(/AdvMapDesc)"/>
   <NameFileRef href="name.txt"/>
   <DescriptionFileRef href="description.txt"/>
   <TileX>136</TileX>
   <TileY>136</TileY>
   <MapGoal href="MapGoalText.txt"/>
   <CustomMapGoal>false</CustomMapGoal>
   <teams>
      <Item>1</Item>
      <Item>1</Item>
   </teams>
   <thumbnailImages>
      <Item href="pic1.xdb#xpointer(/Texture)"/>
   </thumbnailImages>
   <HasUnderground>true</HasUnderground>
   <RandomMap>false</RandomMap>
   <CustomGameMap>true</CustomGameMap>
   <Version>3</Version>
</AdvMapDescTag>
You can add as many pictures you like, I suggest at least 10... but you need to make the .xdb file for each picture.
